Makeup artist Alyssa Brascia’s Halloween makeup tutorial
October 25, 2021
With Halloween around the corner, it’s primetime to nail down your costume for the year. If you’re someone who doesn’t like to put too much effort into a costume and prefers a made-up face and regular outfit, then you’re in luck. Alternatively, if you enjoy taking Halloween to the extremes and dressing to the nines, makeup and all, then you are also in luck.
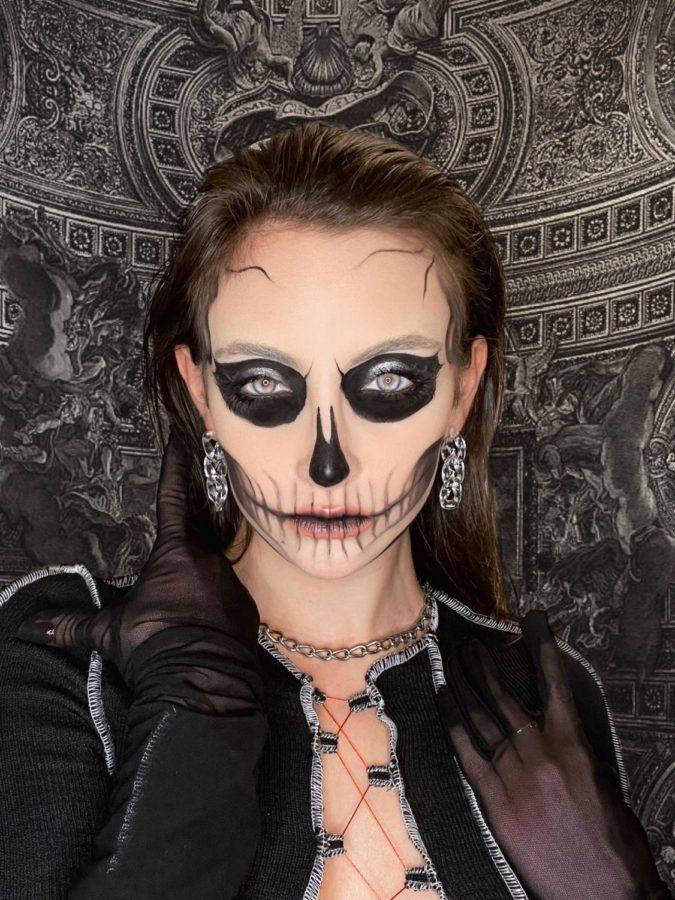
Follow along for a quick and easy tutorial on how to do a skull makeup look for Halloween.
1. Lay your base.
Your first step is to apply a light concealer, foundation or face paint to your skin to create a washed-out, bone-like skin tone. Be sure to blend your product with a makeup sponge and then seal your base with a pressed powder. This will keep your look lasting throughout the night.
2. Contour your bone structure.
Depending on how glamorous or gory you want to make this look, contour your features in a skull-like manner. Chiseling the cheekbones high on your face is a great place to start, and sweeping your contour across the jawline is encouraged as well. Deepen the color with a grayish hue to create a more gaunt look.
3. Prime your eyes.
This step is important, as it will keep your eyeshadow, eyeliner and/or face paint firmly in place into the hours of the night. My go-to product is the MAC Cosmetics Pro Longwear Paint Pot, which acts as a fantastic base for your shadow.
4. Sketch out your skull designs.
To avoid any errors that will ruin the base you’ve created, my trick is to sketch out your design with a thin brush and light brown eyeshadow before outlining. This way, you can buff out any mistakes and start anew without having to return to square one.
When designing your skull, you can choose to make cracks and splits in various parts of the face, but I like to concentrate them in the forehead area. I then create cavities by the temples, carve out the cheekbone and jaw area where teeth will be drawn in, and sketch out my empty sockets over the eyes and nose. However, it is completely up to your own creativity to choose how your skeleton looks.
5. Outline with eyeliner or face paint.
I then use a water-based black face paint with a thin brush to delicately etch the final placements of my designs. Using a steady hand is key for this step, but if you happen to slip up, it’s easy to make a smudge look intentional for skull makeup. Simply add a few more cracks or smudges and no one will know the difference.
6. Shade in your designs.
Create depth in your look by blacking out empty cavities in the face, such as the nose and eye socket and shading in the mouth structure. A fun trick to create a skeletal jawline is to draw angled black lines at the base of your jaw from chin to earlobe, giving the illusion of a sharp edge.
7. Draw in teeth and add extra detail.
You’re almost done – all you need is to draw in teeth and add any fun accents. I like to create teeth by using a thin brush with black eyeshadow or face paint to add long lines over my lips and into the jaw, extending the lines to simulate roots.You can add personal flair to this look by accentuating the eyelid with a pop of silver eyeshadow, applying false eyelashes and even spooky, colored contacts.
To deepen the shading of your design, I recommend patting on yet another layer of black shadow to the eye and nose cavities to blend out any streaks and ensure that the product doesn’t budge.
8. You’re all done!
Dress up in your best all-black outfit, have a night out on the town or turn on your favorite scary movie. However you like to spend your Halloween, this look will be sure to put you in the spirit.
Follow @bybrascia on Instagram for more Halloween makeup ideas, and tag me if you recreate this look this year.