DIY American Flag Shorts
July 4, 2013
The Fourth of July is the perfect excuse to rock the red, white and blue — one of summer’s hottest trends. Here’s the perfect, and easy, way to show your festivity this Independence Day. All you need is a pair of shorts, spray paint, tape, star cut-outs and some American pride.
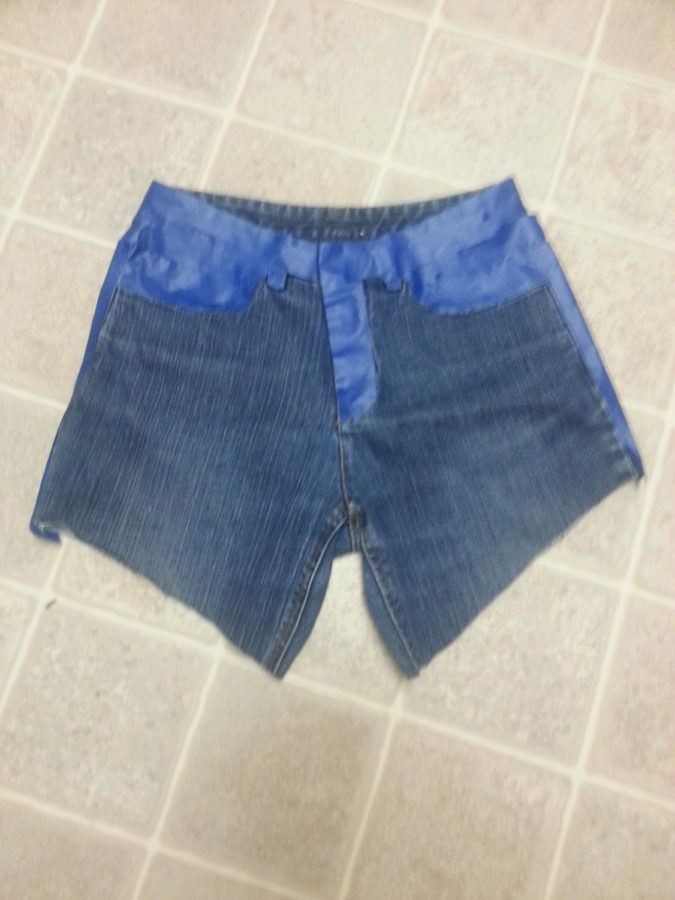
Step One: Start with a pair of denim shorts. I went to Goodwill and purchased a cheap pair of “Mom Jeans,” then cut the legs off to make the perfect high-waisted shorts.
Step Two: Using masking or painters tape, tape off the sections that you don’t want paint on. This includes the waistband, belt loops and pockets.
Step Three: Pop open a can of white spray paint and coat the front of the shorts. I chose to do only one layer of paint so that they look worn.
Step Four: After the white spray paint dries, use the tape and the star cutouts to cover the areas that you want to keep white. The star cut outs should be placed on the right leg of the shorts, and the tape should be placed in stripes on the left leg of the shorts.
Step Five: Find something sturdy, I chose poster board, and cover the left leg of the shorts. This way, only the right leg with the stars is exposed. Grab the blue spray paint and coat the side with the stars on it. After that dries, switch sides and do the exact same thing to the striped side.
Step Six: The moment of truth — after the paint has completely dried, slowly peel back all of the tape and star cut outs. You should have a fresh new pair of American Flag shorts!
Feel free to personalize your pair of shorts by using some studs, rhinestones, or even by distressing them with a razor. For mine, I added studs on the seam line of the pockets and on a back pocket.
Finally, I rolled the bottoms of my shorts up, stood back, and admired my hard work! Pair your shorts with a crop top or a tank, and you have the perfect outfit for any summer event!